|
|
|
diy heat exchanger
Tuesday, January 10 2006
This morning Gretchen and I took a walk on the Stick Trail. Temperatures were warm for this time of year, making for perfect hiking weather. Evidently someone else also had the same idea; Gretchen found a trail of massive Black Bear tracks not far from the infamous Coyote Tree. Until she pointed them out to me, I'd never seen a bear track in snow before. Of course, normally at this time of year bears are hibernating (or that not-quite-hibernating thing they do instead). But when the weather is as warm as it has been they get restless and go out and do things. I wonder where they actually go when they hibernate; I don't know of any true caves around here, though they may exist as an erosional feature in the side of one of the many bluestone cliffs in the area.
I go through periods of time when I have very little I need to be doing for other people and I have lots of free time to do whatever I want. This was how I had the freedom to build an elaborate hydronic solar heating system this fall. I had so few housecalls during that period that I became concerned about whether I was carrying my weight financially, so I started advertising again. Now the phone won't shut up and it seems everyone wants a piece of me. Additionally, I'm doing web development again. But it's hard to get back into that mindset when I'm still far from finished on my slab heat exchanger project.
Today, though, I took a break from some of the new work-a-day reality and did some truly crazy soldering, finally building that heat exchanger I've been preparing to build for weeks. I'd already built the primary heater core and the remaining job was to seal it up inside a 36 inch long length of four inch copper sewer pipe. I'd bought two four inch end caps for either end of that pipe (they'd cost me $25 each) and I'd have to drill two holes in each of those caps to allow copper pipes to carry the water either into and out of either the "primary" or "secondary" of the exchanger. (A heat exchanger is to a hydronic system what a transformer is to an AC electrical circuit.) To cut the holes I used an 9/8ths inch hole saw, which yielded a hole that was a little bigger than what I would have preferred. Happily, though, when I soldered pipes into position passing through these holes, the solder willingly filled the entire void. In cases where it seemed reluctant to do this, I wrapped copper wire or used compression sleaves as a framework for the solder.
I'd been concerned about the structural integrity of such a small ring-shaped solder joint, particularly for the secondary input and output, since they wouldn't have the support of the primary core on the inside of the assembly. So I cut some parallel incisions lengthwise along the penetrating pipe and bent the resulting crenelations into a flat array that I could solder to the inside of the cap.
Another set of concerns centered on all the heat required to solder various things to massive four-inch diameter copper. Would MAPP gas be enough? And would soldering subsequent things destroy the things I'd already soldered? It turned out that MAPP gas provided plenty of heat; getting things hot enough required time and patience, but not really all that much of either. And though it's an exceedingly-good conductor of heat, heating one part of a piece of copper doesn't usually hurt other solder joints, even when they're only an inch away.
The biggest solder joints of all were those that connected the $25 end caps to the pipe. To make those I heated one spot of the junction between them for 30 seconds or so, flowed in some flux, and then flowed in the solder, which would form a joint of about an inch or two in radial length. Then I'd rotate the pipe and continue the process until I'd gone all the way around (a continuous seam more than a foot in length).
When I was finished, I fashioned a pair of testing plugs from two union connectors soldered to boiler drains. With these on either end of the secondary, I could fill the secondary with water and check for leaks. One of the four ring-shaped solders did leak during the first test, but once I'd fixed that the assembly could be pressurized to 40 psi without any problems.

The diagram of the completed heat exchanger. Water from the boiler flows through the primary and water from the slab is pumped through the secondary.
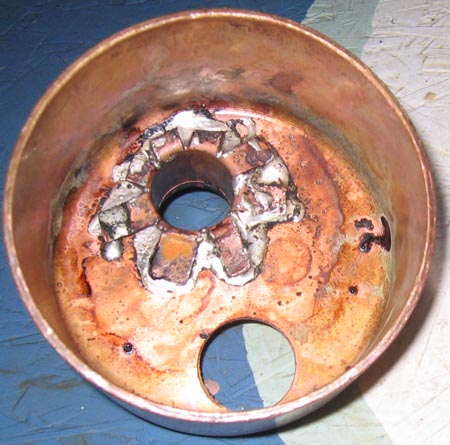
Inside one of the end caps. Here you can see the folded-out crenelations of the secondary's penetration soldered to the cap for added strength.

The primary core, which has been completed for weeks.
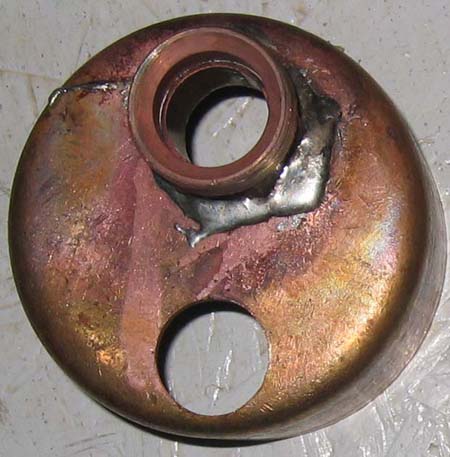
The top of a half-finished cap with secondary penetrations completed.
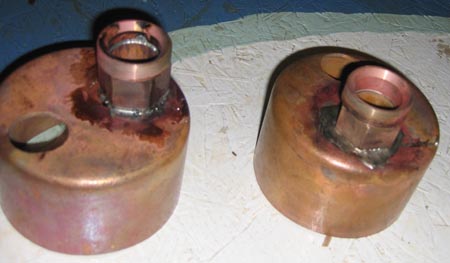
Half-finished caps. I terminated each penetration with a union fitting.
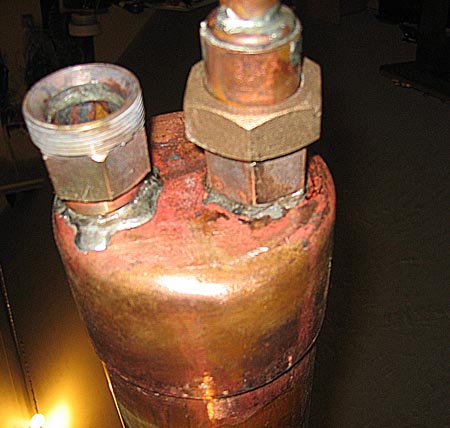
A completed cap with both primary and secondary union fittings. The secondary here has my testing plug.
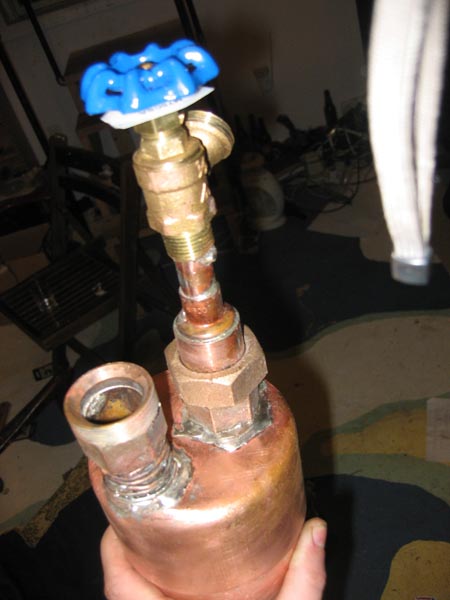
A good view of a testing plug on the secondary.

The entire heat exchanger.
For linking purposes this article's URL is:
http://asecular.com/blog.php?060110 feedback
previous | next |


